How to 3D Print moving parts with PLA?
- Jun 20, 2025
- 4 min read
Updated: Jun 21, 2025
Printing movable components with PLA on an FDM printer can be magical — watching a hinge, gear, or mechanical joint come off the print bed ready to use. But with all things in 3D printing, there's a bit more involved than hitting "print." If you've ever tried to print a moving part and ended up with a fused, solid lump of plastic, you're not alone.
Throughout this tutorial, we will take you through all things 3D printing moving parts with an FDM printer. If you're 3D printing a print-in-place gear assembly, a collapsible tool, or an articulated toy, in this article we'll demonstrate how to stay safe and nail your prints each time.
Why Use PLA for Moving Parts?
Let's start with the basics—why use PLA for moving parts at all?
PLA (Polylactic Acid) is likely the most common 3D print material since it is simple to work with, warps very little, and exhibits great dimensional stability. If you're printing components that rely on exact tolerances (like gears, clips, and hinges), PLA is a great choice. It's not the heat- or flexiest material around, but for low-stress mechanical parts in a building, it's more than sufficient.
Advantages of PLA for Moving Parts
Excellent dimensional precision for close tolerances
Very little warping makes it suitable for print-in-place components
Very broad support across most FDM printers
Simple to print even on lower-end printers
Print-in-Place Models
The most widespread category of 3D printable moving component is known as a print-in-place model. These are models in which the moving parts are printed together in one piece, pre-assembled, but with small gaps to provide freedom of movement after printing.
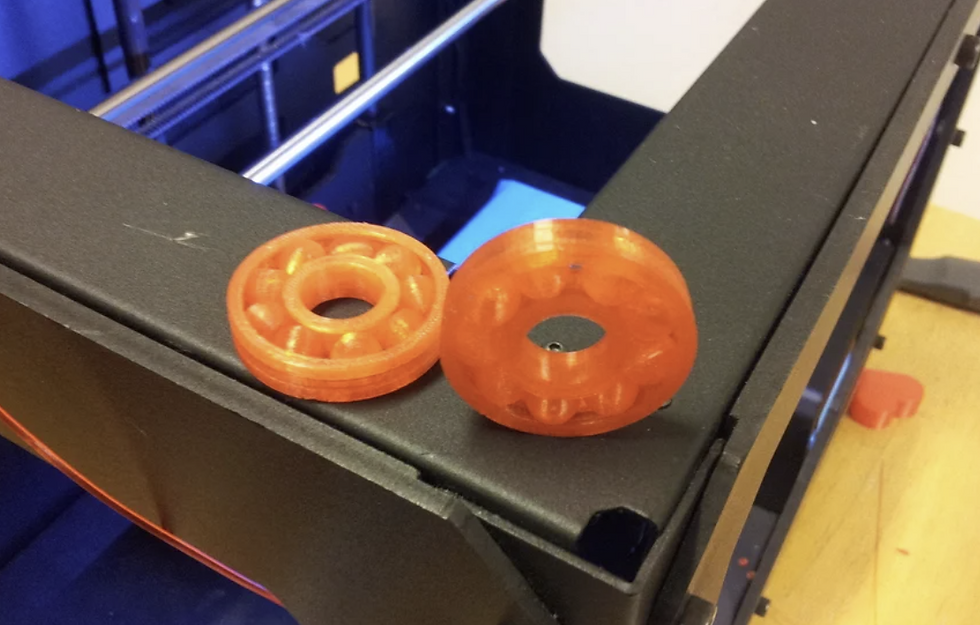
Imagine things such as:
Toy Cars, Articulated Animals, Bearings, Hinges...
Here are just some examples:
Creality Cloud - Multicolor Print in Place Car From ElijahSpirit https://www.crealitycloud.com/model-detail/665d7c98c6a6840e0bade5e5
Thingiverse - Ball Bearing (print in place) From Rotten
Creality Cloud - Hinge - Bisagra From SMT_M 🦊
Creality Cloud - Articulated Shark From McGybeer
The secret to making this successful is that the model must have only a little bit of clearance between parts so they won't weld together when printed—but close enough together so that they will glide easily once free.
Step-by-Step: How to 3D Print Moving PLA Parts on an FDM Printer
1. Choose the Right Model
Start with a well-designed model that is intended for print-in-place functionality or design your own!
When choosing a model, read the comments and print directions. A good designer will usually note if supports are required, the minimum nozzle setting, or if a specific layer thickness is required.
2. Set Up Your 3D Printer
There is no getting around this. If your printer is not optimized, your moving parts will fuse together. Here's what to double-check:
Bed levelling: An unbalanced bed is a sign of uneven first layers. Use a sheet of paper or feeler gauge to make it perfect.
Clean nozzle and bed: Free from residual plastic or grime. Isopropyl alcohol for the bed, and a cold pull or cleaning tool for the hot end. Failure to do so may cause elephants foot or warping.
Calibrate your extruder: Over-extrusion = failure. Use a calibration cube and adjust your E-steps and flow rate. Many new printers use a Lidar or other sensor to calibrate flow rate automatically.
3. Tweak Your Slicer Settings
This is where everyone makes a mistake. In order to have your PLA moving parts print correctly, your slicer settings need to find a balance between strength and precision.
Retraction: Make sure retraction is properly configured and there is no stringing. "Learn as we go" has a great video on the topic:
Switch off supports unless the model specifically says otherwise. Supports will ruin internal joints in print-in-place objects.

Employ a low initial layer height (e.g., 0.2 mm maximum) and slightly increase the initial layer z-offset if needed to avoid "squashing" the bottom too much (elephant's foot) .
4. Begin the Print – and Observe the First Layer
The initial layer is where everything starts. If too close to the bed, the spaces between pieces can get compressed closed and joints will weld together. Ensure:
The nozzle isn't pushing or compressing the filament too forcefully.
You don't use a brim unless all else fails..
The model sticks well without curling or warping.
5. Post-Processing: Releasing the Moving Parts
Even if you did the print perfectly, some joints may need to be persuaded before they will start moving.
Try these techniques:
Let the part cool completely before you remove it from the bed.
Gently flex or twist the moving sections. Don't try to force it, just nudge it on out.
Use a plastic spudger, toothpick, or tweezers to nudge into crevices and pry sections apart.
If stuck, soak the part in warm (not hot!) water to gently soften the PLA and release the joints.
A hair dryer or heat gun on low (extremely carefully!) can also be used to assist with releasing parts—just don't melt anything.
You can also add a little bit of PTFE dry lube or graphite powder to the joints to smooth all the sliding a little bit more.
Troubleshooting Common Problems'
My joints are fused solid.
Possible causes:
Over-extrusion
Nozzle too close to bed
Printing too hot (210°C+)
Gaps are too big, and the parts are loose.
Reasons:
Under-extrusion
Clearance in model is too large
Poor slicer settings or high shrinkage
Gears grind or don't rotate smoothly.
Try:
Reducing print speed
Increasing cooling
Post-processing the teeth with a file or sanding stick
Final Thoughts
Transporting PLA parts with an FDM printer via 3D printing is a very rewarding process when performed correctly. Watching a hinge flex or a gear rotate straight off the build plate is one of those "wow" moments that makes 3D printing so addictive.
It does take some tuning—especially with slicer settings, bed leveling, and understanding your printer’s quirks—but once you’ve got it figured out, the possibilities are endless. Articulated figures, folding tools, mechanical assemblies—all at your fingertips.
Keep experimenting, don’t get discouraged by fused joints, and remember: every failed print is one step closer to getting it right.
Happy printing!
We sell quality PLA that can help you achieve perfect prints and can be used for many mechanical applications!


Comments